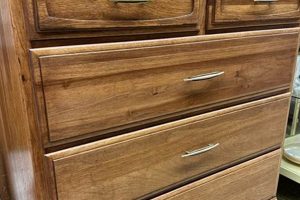
The process of applying a decorative or protective coating to older furnishings, often those possessing unique character or historical significance, constitutes a specific restoration and aesthetic enhancement technique. This technique involves surface preparation, primer application, paint selection, and precise coating application to achieve a desired finish. As an example, transforming an aged oak dresser with a distressed chalk paint finish revitalizes its appearance while preserving its antique charm.
This approach is valuable for extending the lifespan of cherished pieces, aligning dcor with personal style preferences, and preventing furniture disposal, thereby promoting environmental sustainability. Historically, repurposing and refinishing furniture has been a common practice, reflecting economic resourcefulness and a commitment to preserving craftsmanship. The result is often a unique, personalized item that is also cost-effective.
The following sections detail key considerations for undertaking this practice, including preparation techniques, paint selection criteria, application methods, and finishing touches, all contributing to a successful and durable outcome. A thorough understanding of each step is critical for achieving professional results and preventing common pitfalls.
Essential Considerations for Refinishing Antique Furnishings
Achieving a professional-grade finish on aged furniture requires careful planning and meticulous execution. Adherence to established best practices is crucial for ensuring both aesthetic appeal and long-term durability.
Tip 1: Surface Preparation is Paramount: Thoroughly cleaning and sanding the existing finish is essential for optimal paint adhesion. Remove any loose paint, dirt, or wax residue to create a receptive surface. A deglosser may also be beneficial.
Tip 2: Priming for Durability: Application of a high-quality primer is critical, especially when transitioning between different paint types or when dealing with porous surfaces. A primer creates a uniform base, enhances adhesion, and prevents the underlying material from bleeding through.
Tip 3: Selecting the Appropriate Paint: Choose a paint specifically formulated for furniture refinishing. Consider factors such as durability, ease of application, desired sheen (matte, satin, semi-gloss, gloss), and compatibility with the existing finish and primer.
Tip 4: Applying Thin, Even Coats: Multiple thin coats of paint are preferable to a single thick coat. This minimizes the risk of drips, runs, and uneven coverage. Allow each coat to dry completely before applying the next.
Tip 5: Sanding Between Coats: Lightly sand between coats of paint with fine-grit sandpaper (220-grit or higher) to create a smooth surface and improve adhesion. This step is particularly important when using multiple coats of paint.
Tip 6: Sealing for Protection: Apply a clear topcoat or sealant to protect the painted surface from scratches, stains, and UV damage. Choose a sealant that is compatible with the paint and provides the desired level of sheen.
Tip 7: Proper Drying and Curing: Allow the paint and sealant to dry and cure completely according to the manufacturer’s instructions before placing items on the surface. This ensures maximum durability and prevents premature damage.
Following these guidelines increases the likelihood of a successful transformation, resulting in refurbished furniture that is both aesthetically pleasing and long-lasting. These best practices will ensure that time and resources are maximized throughout the process.
With these fundamental principles understood, the subsequent sections will address specific techniques and advanced considerations for achieving exceptional results.
1. Surface Preparation
Effective surface preparation is the foundational element in the refurbishment of antique furnishings. The success of any subsequent painting endeavor hinges on the meticulous execution of preparatory steps. Failing to properly prepare the surface will invariably lead to adhesion failures, uneven finishes, and a compromised final product.
- Cleaning and Degreasing
The removal of accumulated dirt, grime, wax, and grease is paramount. These contaminants impede paint adhesion, resulting in peeling or flaking. Cleaning agents specifically formulated for furniture are recommended, followed by thorough rinsing and drying. For instance, antique furniture often retains remnants of old polishes or waxes, necessitating aggressive degreasing before sanding can commence effectively.
- Sanding Existing Finishes
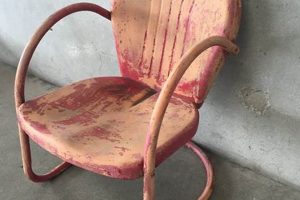
Sanding creates a textured surface to which paint can mechanically bond. The grade of sandpaper used should be selected based on the existing finish and the desired level of distress. Coarse-grit paper is suitable for removing old, damaged finishes, while finer grits are used for smoothing and creating a key for subsequent paint layers. An example is gently sanding a glossy varnish to create a matte surface more receptive to primer.
- Repairing Imperfections
Addressing imperfections such as cracks, dents, and chips prior to painting ensures a smooth and uniform surface. Wood fillers or epoxy resins can be used to repair these defects. Once the filler has cured, it must be sanded flush with the surrounding surface. Ignoring these imperfections can result in them being accentuated by the new paint finish, detracting from the overall aesthetic.
- Dust Removal
After sanding, the removal of all sanding dust is crucial. Residual dust particles interfere with paint adhesion and create a textured finish. Vacuuming followed by wiping with a tack cloth is an effective method for removing dust particles. Failure to adequately remove dust can lead to a grainy and unprofessional final appearance.
The careful attention to each facet of surface preparation directly correlates with the durability and visual appeal of the painted vintage furniture. Without a properly prepared surface, even the highest-quality paints and application techniques will fail to produce a satisfactory, lasting result, highlighting the crucial and non-negotiable role of comprehensive preparation.
2. Primer Selection
The choice of primer exerts a substantial influence on the outcome of painting vintage furniture. Primer serves as an intermediary layer, facilitating adhesion between the existing surface and the subsequent paint coats. Its selection should be predicated on the furniture’s material composition, the existing finish, and the desired aesthetic effect. Inadequate primer selection can result in paint failure, compromised aesthetics, and ultimately, a diminished lifespan of the finished piece.
- Adhesion Enhancement
Primers are formulated to create a mechanical bond with the existing surface, providing a stable base for the paint. This is especially crucial for surfaces with glossy or non-porous finishes, such as those often found on older, lacquered furniture. Without adequate adhesion, paint is prone to chipping, peeling, or cracking over time. For example, applying an adhesion-promoting primer to a previously varnished surface significantly increases the likelihood of a durable finish.
- Stain Blocking
Certain wood types, such as cherry or mahogany, are prone to bleed-through, where tannins or oils from the wood migrate to the surface and discolor the paint. Stain-blocking primers contain pigments and resins that seal the wood and prevent this discoloration. Similarly, older furniture may have existing stains or finishes that could bleed through the new paint. A quality stain-blocking primer mitigates this risk, ensuring a consistent and uniform color.
- Surface Sealing
Porous materials, such as unfinished wood or heavily sanded surfaces, absorb paint unevenly, resulting in an inconsistent finish. Primers seal these surfaces, creating a uniform substrate that promotes even paint absorption and coverage. This is particularly relevant when working with distressed or heavily textured vintage furniture, where porosity can vary significantly across the surface. A sealing primer ensures a consistent sheen and color across the entire piece.
- Tinting and Color Consistency
Primer can be tinted to match the intended paint color, which enhances opacity and reduces the number of paint coats required. This is particularly useful when painting dark furniture with light colors. Tinting the primer ensures a more vibrant and uniform color, reducing the potential for the underlying color to show through. It also saves time and material by minimizing the number of necessary topcoats.
The strategic selection of primer is not merely a preliminary step, but an integral component of the entire refurbishment process. It directly impacts the durability, aesthetic quality, and longevity of the finished furniture piece. Careful consideration of the substrate material, existing finishes, and desired outcome will guide the appropriate primer choice, maximizing the chances of a successful and enduring transformation.
3. Paint Type
The selection of paint dictates the aesthetic, durability, and longevity of refurbished antique furnishings. It is not merely a cosmetic decision but a fundamental determinant of the project’s success. The chemical composition, finish characteristics, and intended application of the paint exert considerable influence on its performance and interaction with the existing substrate. Consequently, a thorough understanding of various paint types is essential for achieving desired outcomes when painting vintage furniture.
The correlation between paint composition and furniture type manifests in practical applications. For instance, milk paint, known for its porous nature and matte finish, is often favored for achieving a distressed or antique appearance. Its breathability allows for natural expansion and contraction of the wood, mitigating cracking and peeling. Conversely, oil-based paints, characterized by their durability and high sheen, are suitable for surfaces subjected to frequent use or requiring enhanced protection against moisture. However, their extended drying time and strong odor necessitate proper ventilation and safety precautions. Chalk paint, recognized for its exceptional adhesion and ease of use, minimizes the need for extensive surface preparation. However, its softer finish necessitates sealing with wax or varnish for increased durability. Each paint type presents distinct advantages and disadvantages, requiring careful consideration of the specific project requirements.
In summary, the choice of paint directly affects the final appearance and durability of refurbished vintage furniture. Factors such as the desired aesthetic, substrate material, and anticipated usage patterns must inform the selection process. Understanding the properties of different paint types empowers informed decision-making, optimizing the likelihood of a successful and enduring restoration. Ignoring these considerations can result in compromised outcomes, underscoring the practical significance of informed paint selection in the art of vintage furniture refurbishment.
4. Application Technique
The method of paint application to antique furniture significantly influences the final finish quality, durability, and overall aesthetic. Incorrect application can negate the benefits of proper surface preparation and high-quality paint selection, resulting in uneven coverage, visible brushstrokes, or premature wear. Consider a scenario where chalk paint is applied too thickly with a brush; the result is likely to be visible brushstrokes that detract from the desired vintage aesthetic. Conversely, employing a sprayer for even application can achieve a smooth, professional finish, especially on furniture with intricate details.
Different techniques cater to diverse paint types and desired finishes. Brushing is commonly employed for detail work and achieving a textured look, while rolling is suited for large, flat surfaces. Spraying, whether with an airless sprayer or aerosol can, offers the advantage of uniform coverage and is particularly effective for furniture with complex shapes. Each technique demands specific considerations; brushing requires controlled pressure and overlapping strokes, rolling necessitates a consistent pace to prevent uneven buildup, and spraying mandates proper distance and nozzle control to avoid drips and runs. Skilled application, such as the strategic use of layering to build color depth or employing a dry-brush technique to create a weathered appearance, elevates the transformation of vintage furniture beyond mere repainting.
In conclusion, mastery of paint application techniques is a non-negotiable aspect of vintage furniture refurbishment. The choice of method, coupled with diligent execution, directly determines the visual appeal and longevity of the finished product. While challenges such as preventing drips or achieving consistent coverage exist, a comprehensive understanding of application principles ensures that the restoration process aligns with the broader goal of preserving and enhancing the unique character of antique furnishings.
5. Distressing Methods
The application of distressing methods represents a deliberate technique in the domain of furniture refinishing, specifically utilized to impart an aged or worn aesthetic to newly painted surfaces. This technique directly contrasts with the pursuit of a pristine, flawless finish, instead aiming to emulate the effects of time, wear, and exposure on furniture. The intentional creation of imperfections, such as worn edges, exposed undercoats, and simulated scratches, seeks to imbue the piece with character and a sense of history. Without the proper execution of distressing methods, a freshly painted piece may lack the authentic charm associated with vintage or antique furniture. For example, lightly sanding the edges of a painted dresser allows the underlying wood or previous paint layers to show through, instantly giving the piece a sense of age that a uniform coat of paint cannot achieve.
Successful distressing necessitates a nuanced understanding of various techniques, including sanding, dry brushing, layering, and the application of antiquing glazes. Each method produces distinct visual effects, and their strategic combination can yield complex and realistic results. Sanding, often focused on edges and corners that would naturally experience wear, physically removes the top layer of paint. Dry brushing, involving the application of minimal paint with a stiff brush, creates a textured, uneven finish. Layering entails applying multiple coats of different colors, then selectively removing portions of the topcoats to reveal the underlying hues. Antiquing glazes settle into crevices and details, accentuating texture and simulating accumulated dirt and grime. The deliberate choice of technique depends on the desired aesthetic and the specific characteristics of the furniture piece.
In conclusion, the integration of distressing methods is critical in effectively painting vintage furniture, bridging the gap between a new coat of paint and an authentic antique appearance. Mastering these techniques enables a purposeful manipulation of the painted surface, resulting in furniture that captures the essence of age and history. Although challenges such as over-distressing or creating an artificial look exist, a judicious application of these methods contributes significantly to the successful refurbishment of antique furnishings, reinforcing the integral connection between distressing and a truly vintage aesthetic.
6. Sealing and Protection
The application of a sealant or protective topcoat constitutes a critical final step in the process of painting vintage furniture. This protective layer serves as a barrier against environmental factors, physical abrasion, and chemical exposure, thereby extending the lifespan and preserving the aesthetic integrity of the painted surface. Without adequate sealing and protection, the investment in surface preparation, priming, and painting can be rendered futile, as the finish is susceptible to damage that detracts from the overall outcome.
Sealants provide a physical barrier that resists scratches, stains, and moisture penetration, all of which can compromise the painted finish. For example, vintage dining tables, often subjected to spills and frequent use, benefit significantly from a durable sealant. Polyurethane-based sealants offer superior resistance to abrasion and moisture, making them suitable for high-traffic surfaces. Water-based acrylic sealants provide a more environmentally friendly option, with good durability and ease of application. The choice of sealant should align with the intended use of the furniture and the specific properties of the paint used. For instance, wax sealants are often employed with chalk paint to enhance its matte finish and provide a degree of protection, although they require periodic reapplication.
In conclusion, sealing and protection are indispensable components of the painting vintage furniture process. By providing a protective barrier, sealants safeguard the painted finish from environmental damage, physical wear, and chemical exposure. The selection of an appropriate sealant, tailored to the specific requirements of the furniture piece and paint type, directly contributes to the long-term preservation of the restored vintage furniture. Failing to prioritize sealing and protection undermines the investment in other stages of the restoration process, ultimately diminishing the value and longevity of the finished product.
7. Curing Time
The duration required for a newly applied coating to reach its maximum hardness, durability, and resistance to environmental factors is a critical consideration in the refinishing of antique furniture. Adequate curing time is essential for ensuring the longevity and aesthetic quality of the finished piece. Premature use or handling of furniture before full curing can result in damage to the finish, compromising the entire restoration effort.
- Chemical Hardening Processes
Paints and sealants undergo complex chemical reactions during the curing process, leading to the formation of cross-linked polymer networks. These reactions require specific environmental conditions, such as temperature and humidity, to proceed optimally. Insufficient curing time prevents complete cross-linking, resulting in a softer, more vulnerable finish. For example, applying furniture polish before the paint has fully cured can disrupt the chemical hardening process, leading to a dull or uneven appearance.
- Solvent Evaporation and Film Formation
Many coatings contain solvents that evaporate during the curing process, leaving behind a solid film. Incomplete solvent evaporation can result in a sticky or tacky surface, making the furniture susceptible to dust accumulation and fingerprints. Extended curing times, particularly in humid environments, allow for thorough solvent evaporation and the formation of a durable, resilient film. Failure to provide adequate ventilation during curing can impede solvent evaporation, prolonging the curing process and potentially compromising the finish.
- Impact on Durability and Scratch Resistance
The hardness and scratch resistance of a painted surface increase significantly as the coating cures. Handling furniture before the finish has fully hardened can result in scratches, dents, or other forms of damage. For instance, placing decorative items on a freshly painted tabletop before it has fully cured can leave permanent indentations in the finish. Allowing the recommended curing time ensures that the painted surface reaches its maximum level of protection, preserving its aesthetic appeal over time.
- Adherence and Inter-coat Bonding
Proper curing time facilitates the optimal adhesion between the paint and the underlying surface, as well as between multiple coats of paint. Insufficient curing can lead to delamination or peeling, particularly in areas subjected to stress or friction. Allowing each coat of paint to cure adequately before applying the next promotes inter-coat bonding, creating a cohesive and durable finish that withstands environmental fluctuations and physical wear.
The relationship between curing time and the process of painting vintage furniture is critical, influencing the final quality and longevity of the restored piece. Optimal results are achieved through adherence to manufacturer-specified curing times and environmental conditions, ensuring that the chemical and physical transformations necessary for a robust finish are completed. Ignoring the curing time recommendations undermines the entire restoration process, diminishing the value and durability of the antique furniture.
Frequently Asked Questions
This section addresses common inquiries related to the processes and considerations involved in applying paint to antique furnishings, offering clarity and guidance to ensure optimal results.
Question 1: Is specialized paint required for vintage furniture?
While standard paints can be utilized, formulations specifically designed for furniture offer enhanced adhesion, durability, and finish characteristics. Chalk paints, milk paints, and acrylic enamels are frequently selected for their suitability with older pieces.
Question 2: How does one prepare a vintage furniture surface for painting?
Surface preparation typically involves thorough cleaning to remove dirt, grease, and old wax, followed by sanding to create a receptive surface for the primer. Repairs to any imperfections are also undertaken at this stage.
Question 3: What primer is best suited for painting vintage furniture?
The choice of primer depends on the existing finish and the desired outcome. Oil-based primers are effective for stain-blocking, while latex primers offer good adhesion and are easier to clean. Shellac-based primers are versatile and provide excellent adhesion to glossy surfaces.
Question 4: What techniques prevent brushstrokes from being visible on the finished surface?
Employing high-quality brushes, applying thin coats of paint, and lightly sanding between coats can minimize brushstroke visibility. Alternatively, using a sprayer provides a smooth, even finish, eliminating brushstrokes altogether.
Question 5: How is a distressed finish achieved on painted vintage furniture?
Distressing can be accomplished through various methods, including sanding edges and corners, dry brushing, or applying antiquing glazes. These techniques selectively remove or alter the paint to simulate wear and age.
Question 6: What is the recommended procedure for sealing painted vintage furniture?
Applying a clear topcoat or sealant protects the painted surface from scratches, stains, and UV damage. Polyurethane, lacquer, and wax are common sealant options, each offering varying levels of protection and sheen.
Careful attention to these frequently asked questions provides a foundation for a successful furniture painting project. Thorough preparation and thoughtful decision-making contribute to a durable and aesthetically pleasing outcome.
The following section will provide a summary of the material covered in this article.
Conclusion
This exploration of painting vintage furniture elucidates the critical aspects of surface preparation, primer selection, paint application, distressing methods, sealing techniques, and curing times. Each step directly impacts the final result, influencing both the aesthetic appeal and the durability of the restored piece. Mastery of these processes ensures a successful transformation, resulting in refinished furniture that embodies both visual appeal and lasting quality.
Understanding the nuances of “how to paint vintage furniture” empowers one to preserve and enhance these furnishings for future generations. Armed with this knowledge, practitioners can approach each project with confidence, transforming aged pieces into cherished heirlooms. The restoration and preservation of vintage furniture represent a sustainable practice and a valuable contribution to the preservation of cultural heritage. Undertaking the task with diligence and informed technique guarantees an enduring legacy for each restored item.


